Let the Games Begin
As I mentioned in our very first post, in order to buy and maintain a house in our ideal neighborhood, we have been renting our basement. The original basement layout was missing several crucial elements that would allow us to rent out the floor as a separate unit, most notably- a kitchen.
Last January we discussed options and got quotes from two contractors. The quotes came back five thousand dollars apart. In addition, the layout and quality outlined in Pablo’s estimate was far superior. The first contractor wouldn’t even entertain our ideal layout because it involved moving our washer and dryer (and associated plumbing). It was an easy choice. We were able to get Pablo’s quote down another $2,500 by completing all painting and flooring ourselves, which brought the budget within reach.
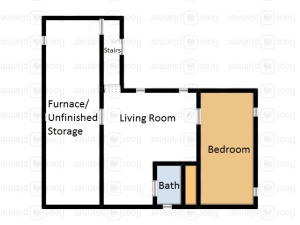
The original basement layout looked like this:
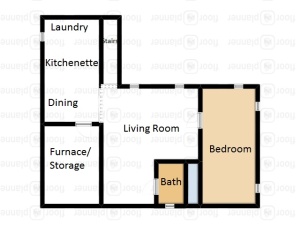
And we had re-imagined the space to look like this:
The plans were complete with plumbing to reroute, walls to remove, and the promise of hidden problems. We braced ourselves for our first renovation.
Carbon Monoxide Detectors, Detection, Confusion
We purchased smoke and carbon monoxide detectors on the day we closed on our house, but it took us three weeks before we activated and installed them. So it came as quite a shock a few days later when the carbon monoxide detector started tweeting. It made a cute little double tweet sound that we soon learned to fear and loath. Seriously, that sweet little twitter could haunt my dreams.
After determining that double beep meant carbon monoxide and running a makeshift reliability test (taking the detector outside made it stop beeping and bringing it back in made it go off again), we called the non-emergency police number and evacuated the house along with the dinner I was in the middle of prepping.
If you haven’t met all your new neighbors, chopping beets on the hood of your car while an ambulance and two fire trucks pull up with sirens blaring is one option.


The fire department detected low levels of carbon monoxide throughout the house that dissipated down to an acceptable level while they were there. They turned on every gas appliance in the house and said the carbon monoxide was not a malfunction of any appliances (phew) so they suspected it was from a floor drain in our basement with a dry trap. They poured water down the drain and told us to have a plumber come the next day for a full assessment. We thanked them profusely and got a plumber to come the very next day. He agreed that it was most likely a dry trap probably from the house being unoccupied while it was being readied for going on the market. He said that as long as the trap isn’t broken we should just pour water down it a few times a month. We started dutifully pouring water down the drain every time we did our laundry and thought the problem was solved until our carbon monoxide detector went off again….
We called the plumber right back and he was able to send someone the next day. They snaked the ventilation pipe because back pressure from a clogged or improperly vented pipe can cause a suction effect to the water in the trap.
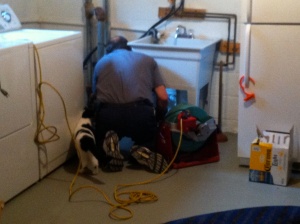
We were told that it was possible the trap was broken but we wouldn’t know unless the alarm went off again….and it did.
So we called back our plumber and he laid out our options. We could:
1) Replace the trap in the floor drain, which would require drilling in the cement floor and re-pouring cement = very pricey
2) Fill the drain with cement, which is less expensive but a very permanent solution in which we are left with no floor drain in case of flooding or any of our appliances leaking- washing machine, furnace, hot water heater.
3) Buy a $10 expandable plug similar to this one
Of course we liked option three best… until the carbon monoxide detector went off again. By this time my mom was so concerned she had gifted us a fancy carbon monoxide detector that displayed the amount of carbon monoxide in the house in parts per million. When we weren’t able to bring down our carbon monoxide levels by opening our windows we called non-emergency once again. We begged the dispatcher not to have the firemen use their sirens this time. They checked all our gas appliances once again and said they were fine so they recommended we call our plumber back.
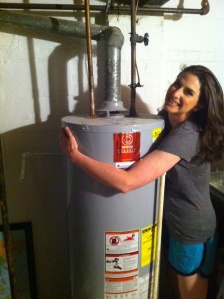
By this time we were beyond distressed. Not even the experts could figure out the source of the carbon monoxide in our house. We tried to piece together a pattern. We couldn’t pin down anything conclusively, but the alarm sometimes went off after we ran a load of laundry and sometimes when a few people took showers consecutively. We decided to run a little test. We do NOT recommend this strategy and we know that carbon monoxide detectors are not supposed to be located in a furnace room and certainly not directly next to your gas appliances. However, we were desperate so we got creative in an effort to prove our suspicion. We put the carbon monoxide detector next to the hot water heater. It continued reading zero. We turned the basement shower on full blast using hot water and kept our eyes on the carbon monoxide levels. Within a minute it read 60! This was all the evidence we needed. We turned off the water, opened the windows, aired out the house until the meter levels were back to zero, and scheduled to have a new hot water heater installed immediately. Despite our unconventional/incorrect means to an end we have not had a single problem or heard a peep from even one of our THREE carbon monoxide detectors since we installed the new hot water heater. I know they say you can’t buy piece of mind, but this particular purchase felt pretty darn close!
Tiny Room Problems
The first room in the house that called out for attention was actually our smallest: the upstairs bathroom which measures in at just 4.5x7ft.
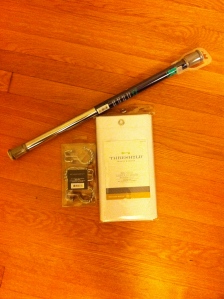
We decided that after many years of rental bathrooms and tension rod shower curtains we were going to take advantage of owning a home and install what seemed to be the first non-tension rod shower curtain in our house’s 57 years. We went to Home Depot the same day we closed on the house and purchased a curved curtain rod in chrome to match the hardware already in the bathroom.
Similar to this one: http://www.homedepot.com/p/Glacier-Bay-6-ft-Curved-Shower-Rod-in-Chrome-35603SSHD/203601467?N=5yc1vZbz9l
Installation was pretty straightforward until our drill hit what we believe to be cinder block. Our plaster and cinder block surrounded bathroom wasn’t going to blockade us from the mounted shower curtain of our dreams… we dream big apparently. We put several holes in the wall before finding a spot we could get our screws in deep enough to support the curtain, which resulted in a wall mount curtain slightly higher and farther out from the tub but you should see the amazing elbow room inside!
After a few days in the space we ran across several more problems:
•Humidity problems –> Peeling paint revealed that we needed a new (i.e. working) vent and paint that could withstand humidity
•Water issues –> soft/rotting window frame
•Privacy issues –> the opaque window had us trustingly showering for the first week before we realized we were giving the neighborhood a bit of a show (much like the Cell Block Tango dance number from moulin rouge):
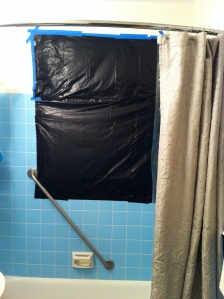
All three issues had to be addressed immediately…especially the Moulin Rouge issue. Our temporary solution was to duck tape a trash bag over the window and frame to protect the frame from water and blackout innocent passers by.
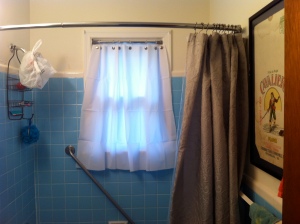
We had a professional come out to inspect the window and it turned out the actual rotted part of the frame had previously been torn out and caulked. The old caulk was what was mushy feeling in the frame. We showered downstairs for a few days to allow the frame to fully dry out before ripping out all the old caulk and re-caulking. Once dry we painted the caulk white to match the window trim. We re-caulked around all the bathtub hardware while we were at it. After allowing to dry once more we protected our assets (double meaning if you refer back to problem number 3) by adding a shower curtain in the window. A quick trip to target resulted in the materials needed:
We gave up on the no tension rod in the bathroom dream and simply suspended our cut-to-size shower curtain on a tiny window tension rod. The curtain keeps water away from the window frame and blocks all shower street views.
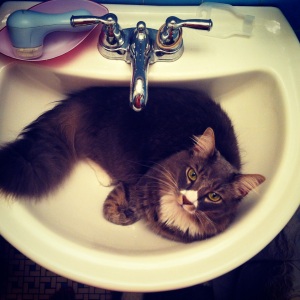
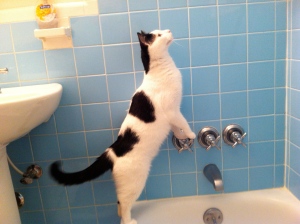
We concluded that the bathroom paint was peeling because the previous owner had painted with a matte finish so after we had a new vent installed to prevent future humidity problems we painted the room with a mildew primer and white eggshell finish paint. Gus and Al were both quite intrigued by the bathroom antics and joined in whenever they could:
It has been about 8 months since we repainted and we haven’t had one bit of paint peeling since. The only part of the room that we didn’t paint was the ceiling were we have since noticed periodic mildew so we plan to go back through with another sweep of mildew primer + eggshell paint.
Whoever thought having a window inside the shower was a good idea anyway?
Raise the (New) Roof
The first project we tackled wasn’t much of a choice. May showers did not disappoint us in 2013 and as “luck” would have it there was a fresh leak in the living room on both the day of the inspection and the final walk through. We didn’t feel very lucky about our leaks at the time but we were able to negotiate some money back from the seller because of it.
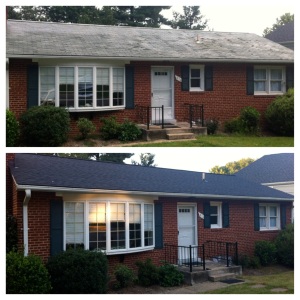
By the time we got three estimates and the rain stopped long enough for a days worth of roofing our house looked like this:
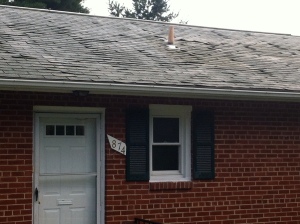
After several weeks of lamenting every rain drop that fell, it was all done in a days worth of work:
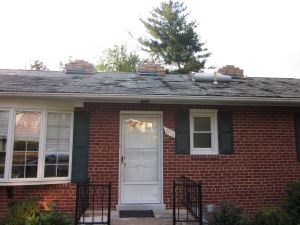
The result was worth the wait and we no longer have to climb into our attic and strategically place pans and buckets every time it rains:
Recent Comments